

Workflow
Questions often arise about when to apply NoiseXTerminator in an image processing workflow. There are a few guiding ideas to keep in mind:
- Noise reduction of any kind should never be applied before deconvolution of any kind, including BlurXTerminator
- NoiseXTerminator can just as easily process linear data as non-linear (stretched) data
- For the intensity/color separation option (described below) to work, NoiseXTerminator needs to be run on a color image (i.e., after channel combination)
- NoiseXTerminator is trained to handle differences in noise statistics between color channels
Deconvolution, to truly be called deconvolution, requires linear data that has not been noise-reduced. Good deconvolution tools, such as BlurXTerminator, are designed to operate and produce accurate results in the presence of noise. There is nothing stopping anyone from mis-applying tools, but serious astrophotographers adhere to principles and practices that maintain the integrity of their data, and their processed images show it.
Internally, NoiseXTerminator applies a stretch prior to reducing noise, and then precisely reverses it afterwards. So there’s really not much difference from the neural network’s perspective whether linear or nonlinear data is being processed – it tolerates either quite well.
Sometimes an image will have much higher noise in one or more color channels compared to the others. This frequently happens in narrowband imaging, for example with the channel containing data from exposures with a sulfur [S II] filter. With most objects this is a very weak signal and thus has higher noise. In addition, this channel is often boosted quite a bit to bring out the features and/or achieve a good color balance. Both of these can conspire to give this channel much higher noise. A similar effect can occur when adding comparatively noisy hydrogen alpha data to the red channel in an RGB image.
The good news is that NoiseXTerminator was trained to handle such differences. As a result, there should be no need to perform noise reduction on these monochrome images separately, prior to channel combination into a color image. In fact, it is probably best to perform noise reduction after channel combination so that NoiseXTerminator can “see” all channels simultaneously. In addition, the intensity/color separation mode, described below, cannot work on grayscale images – it needs a color image to perform this separation.
Real-time preview
Noise reduction is a highly subjective process, typically requiring careful tuning of parameters for the best and most natural results. It is highly recommended to use PixInsight’s real-time preview function to tune NoiseXTerminator for each image. Updates to the parameters will be reflected in the real-time preview window after a short delay.
The Denoise parameter

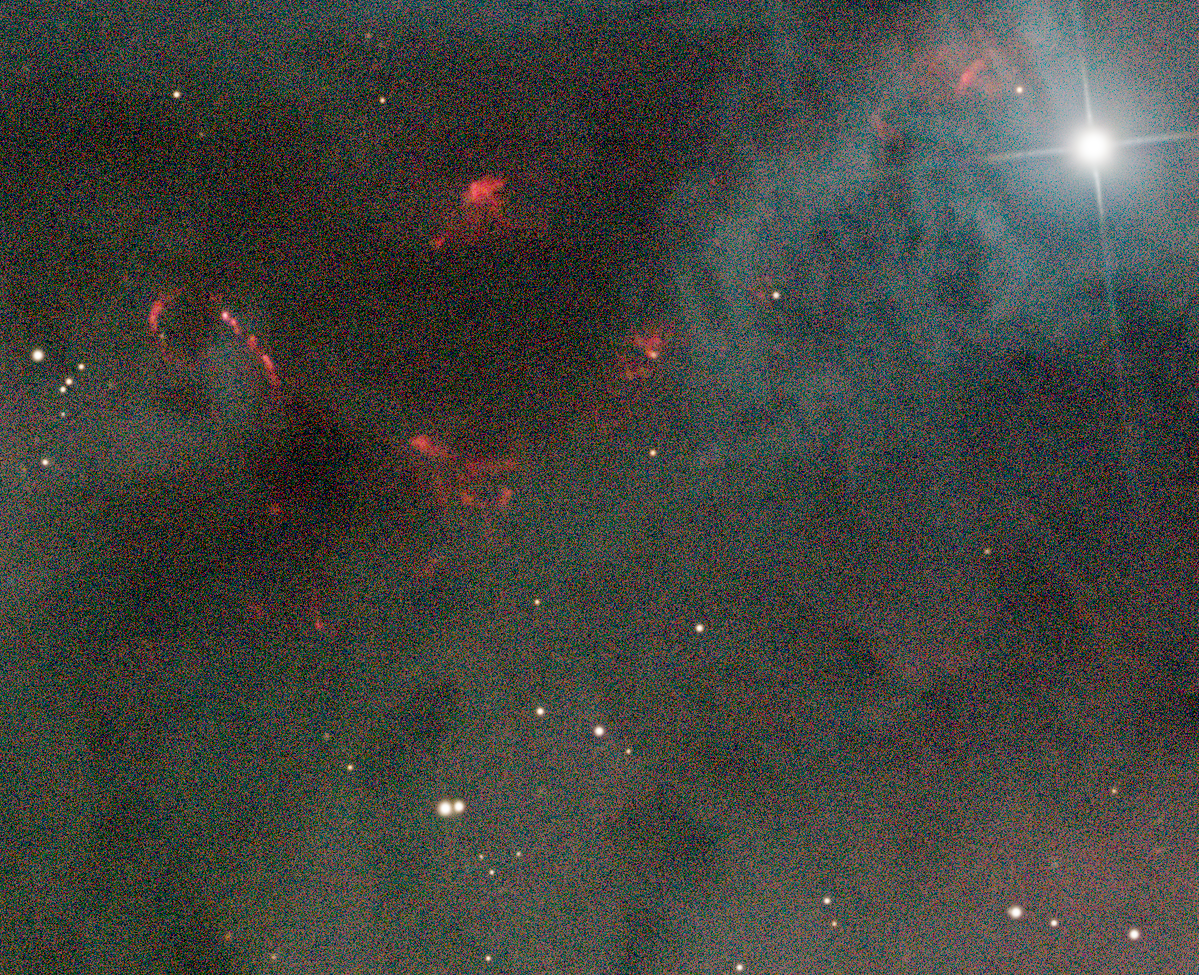
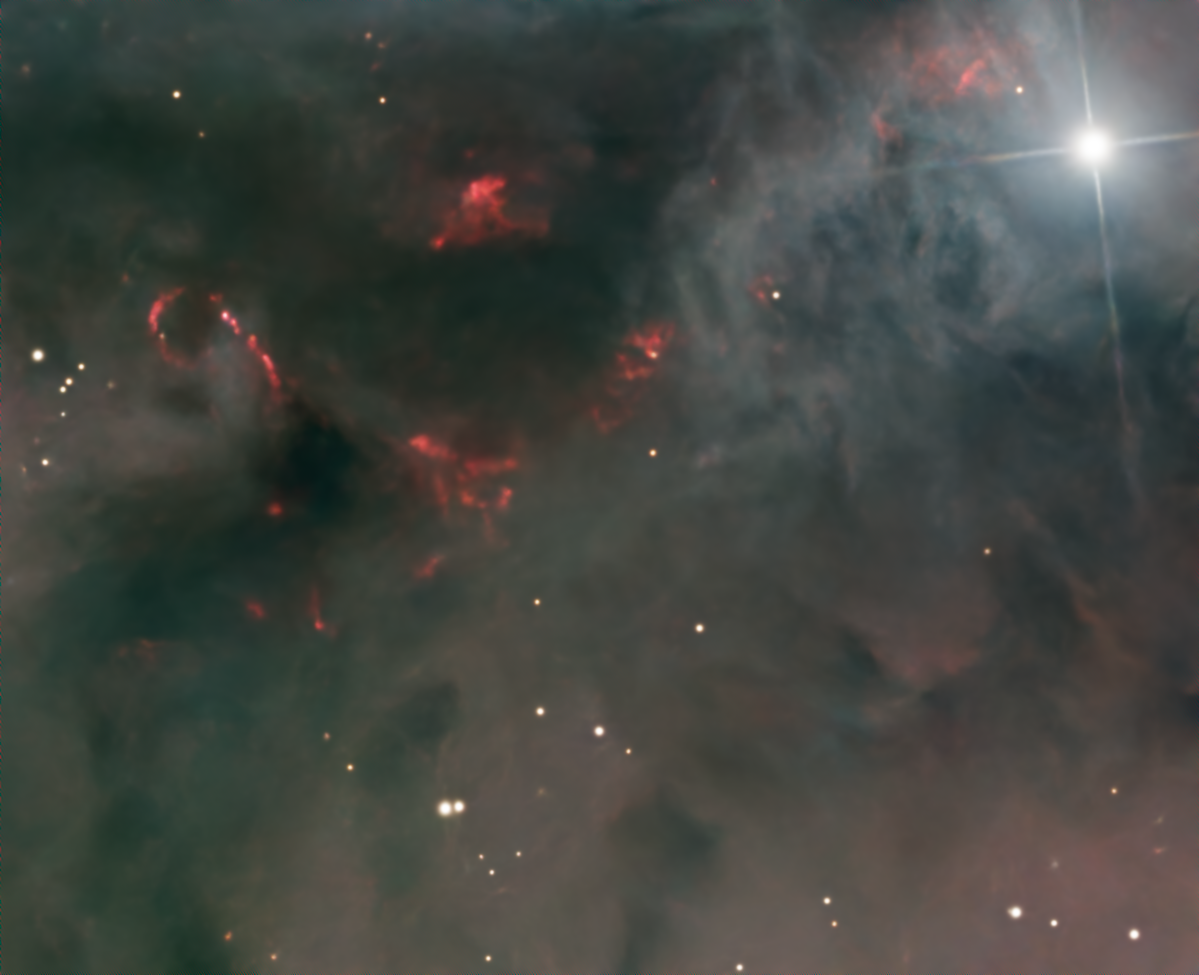
The “Denoise” parameter controls how much noise is removed from the image. A value of “0.00” means to remove none of the noise, and will leave the image unchanged. A value of “1.00” means to remove all of the noise. The choice of how much noise to remove or leave in the image is yours to make, but keep in mind that removing 100% of the noise can create an overly-smooth image that can look a bit unnatural.
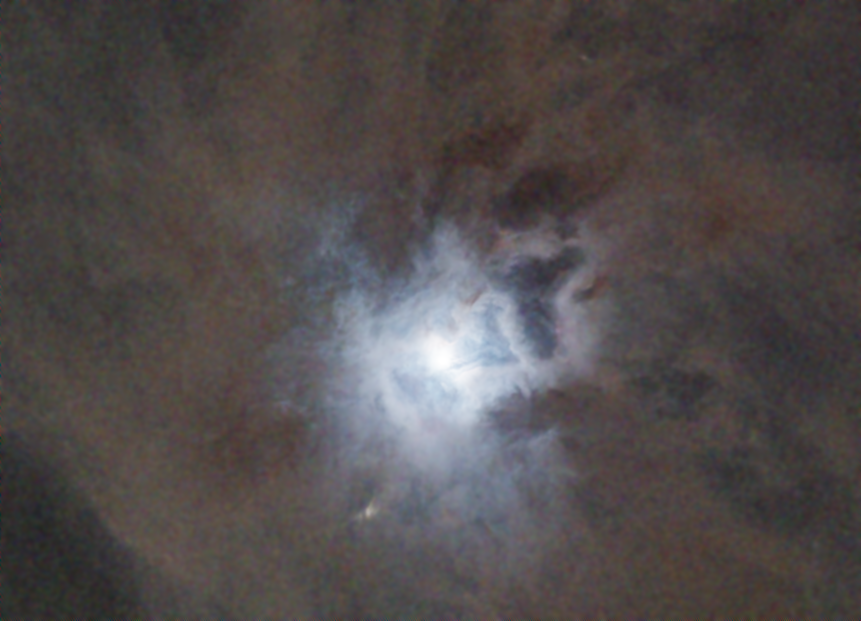
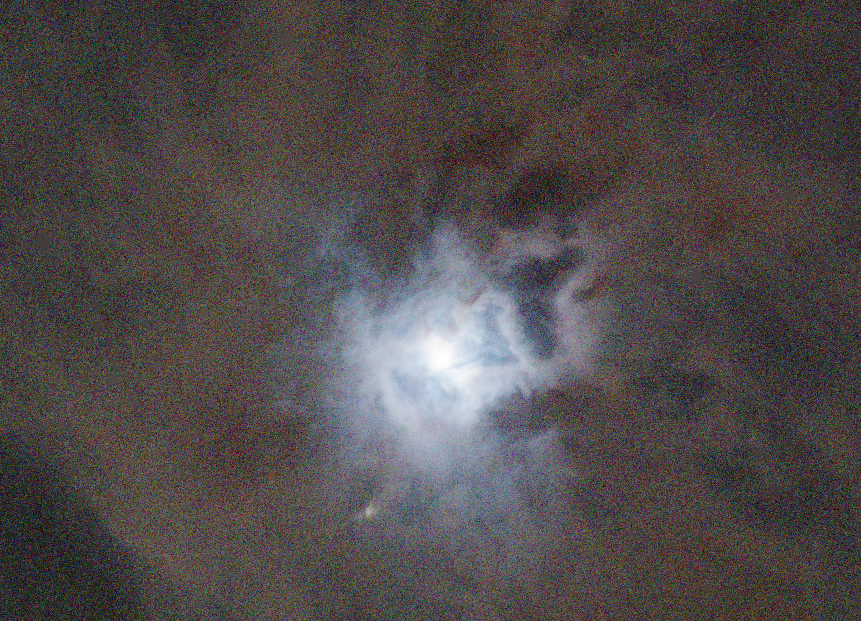
Here is an example comparing the original, 85% noise reduction (0.85), and 100% noise reduction (1.00).


The Iterations parameter

This parameter controls how many steps NoiseXTerminator takes to remove noise using a technique called “successive approximation.” Better results can sometimes be obtained by removing the noise gradually over a number of steps rather than all at once. Increasing the number of iterations tends to retain detail better in very noisy areas of an image, and may help smooth the background. A high number of iterations can lead to artifacts appearing, however, so inspect the results carefully.
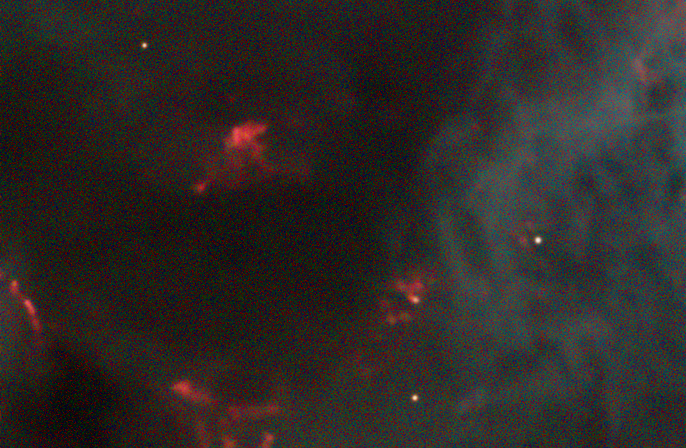
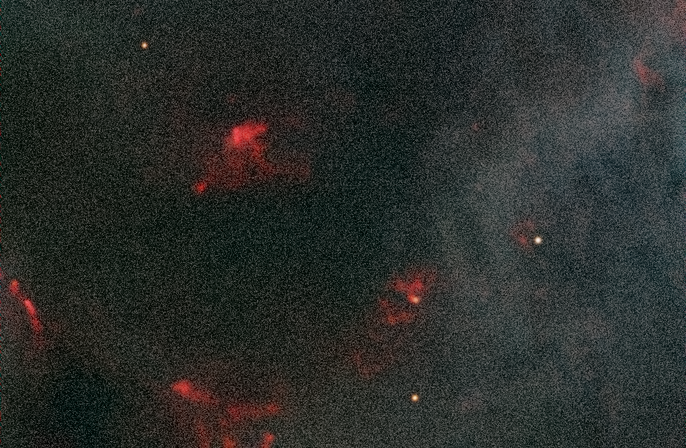
This is a subtle adjustment – you may not notice any difference in images that already have low noise, but the difference can be substantial on very noisy images, or in faint, noisy areas of any image. Here is a comparison between one and five iterations on a very noisy section of an image:

The trade-off here is execution time: it will take longer to perform more iterations.
Intensity/color separation

In color images, noise can be separated into two components: intensity, the “brightness” part of the noise, and color. NoiseXTerminator allows you to independently control how much of each of these components to remove.
As you can see, the color component of the noise is often more objectionable than the intensity component. Good, natural results can thus often be obtained by reducing the color component more than the intensity component
Frequency separation

Noise can also be divided into “high frequency” and “low frequency” components. The term “frequency” here refers to the scale, or size, of the random fluctuations that comprise the noise. High-frequency noise refers to fine-scale, pixel-to-pixel variations, whereas low-frequency noise is larger-scale random variation, appearing as blotches or random ripple. Raw noise in an unprocessed image has both high- and low-frequency components.

In addition to allowing different amounts of high- and low-frequency noise reduction, NoiseXTerminator also allows you to define the scale that separates the high- and low-frequency components using the “HF/LF Scale” parameter. It is easiest to adjust the HF/LF scale parameter using PixInsight’s real-time preview function and temporarily setting “Denoise LF” to zero, like this:

Then, while watching the real-time preview window, adjust the HF/LF Scale parameter to target noise or image features of a desired size:

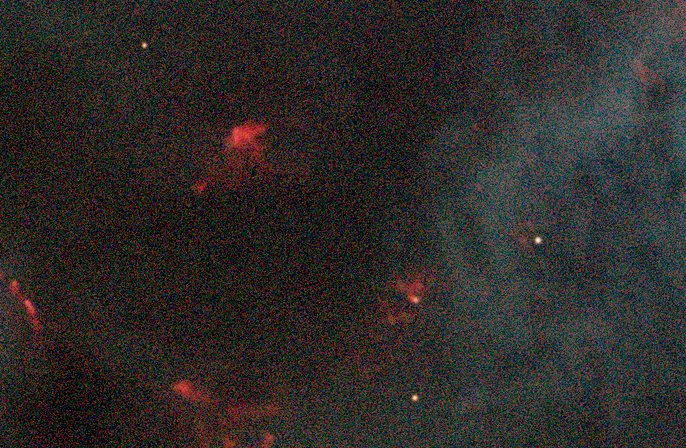
Once the HF/LF Scale parameter is adjusted, choose the amounts of HF and LF noise reduction. Often it is best to use a lower value for LF noise reduction, especially on objects that have a lot of natural low-frequency variations, such as dust clouds.
Combined modes

The intensity/color separation and frequency separation modes may be used together by selecting both checkboxes:
This is a lot of parameters to adjust, but think of these as different, independent “axes” that can be explored for best results on your images. Often, great results can be obtained using something like the following combination of settings:
- A moderately high amount of HF intensity noise reduction, say 80-90%
- A high amount of HF color noise reduction, e.g., 90-100%
- A moderate amount of LF intensity noise reduction, e.g., 50-70% – this can help to retain natural fluctuations in many objects such as dust clouds
- A high amount of LF color noise reduction, e.g., 100% – this will eliminate the colored “patches” or “blotches” that can often appear at larger scales
- Adjust the HF/LF scale parameter to target retention of features naturally present in your image. The best setting will likely be different from object to object.
Different images will likely require different settings for best results. If it gets too overwhelming, you can always drop back to one of the simpler modes.
Scripting
Like any process in PixInsight, NoiseXTerminator can be scripted. If you click the Instance Source Code button in the NoiseXTerminator window, you will see the parameters that can be set:

If the enable_color_separation and enable_frequency_separation parameters are false, then only the denoise and iterations parameters will be relevant.
If enable_color_separation is true and enable_frequency_separation is false, then the denoise parameter controls how much intensity noise to reduce, and the denoise_color parameter controls how much color noise to reduce.
Conversely, if enable_frequency_separation is true and enable_color_separation is false, then the denoise parameter controls how much the high-frequency noise is reduced, and denoise_lf controls how much the low-frequency noise is reduced.
Combining the separation modes by setting both enable_color_separation and enable_frequency_separation to true, the parameters have the following meanings:
denoise: reduction of high-frequency intensity noisedenoise_color: reduction of high-frequency color noisedenoise_lf: reduction of low-frequency intensity noisedenoise_lf_color: reduction of low-frequency color noise
The iterations parameter applies in all of the above modes, and controls how many successive-approximation steps NoiseXTerminator takes when estimating the image noise. It only applies to AI version 3, and has no effect when using AI version 2.
The detail parameter only applies when using AI version 2, and controls the amount of sharpening applied during noise reduction. It has no effect when using AI version 3.